With a source connected and a collection curated, the last step is putting the widget on your store and shipping it. Idukki generates the install code for you in the Publish Collection screen: copy the snippet for your website, or follow the guided steps if you are on Shopify.
Go live
- Open Publish Collection. Open the Publish Collection screen for your gallery. If your store is Shopify, it defaults to the Shopify path; otherwise it shows the website (HTML) path.
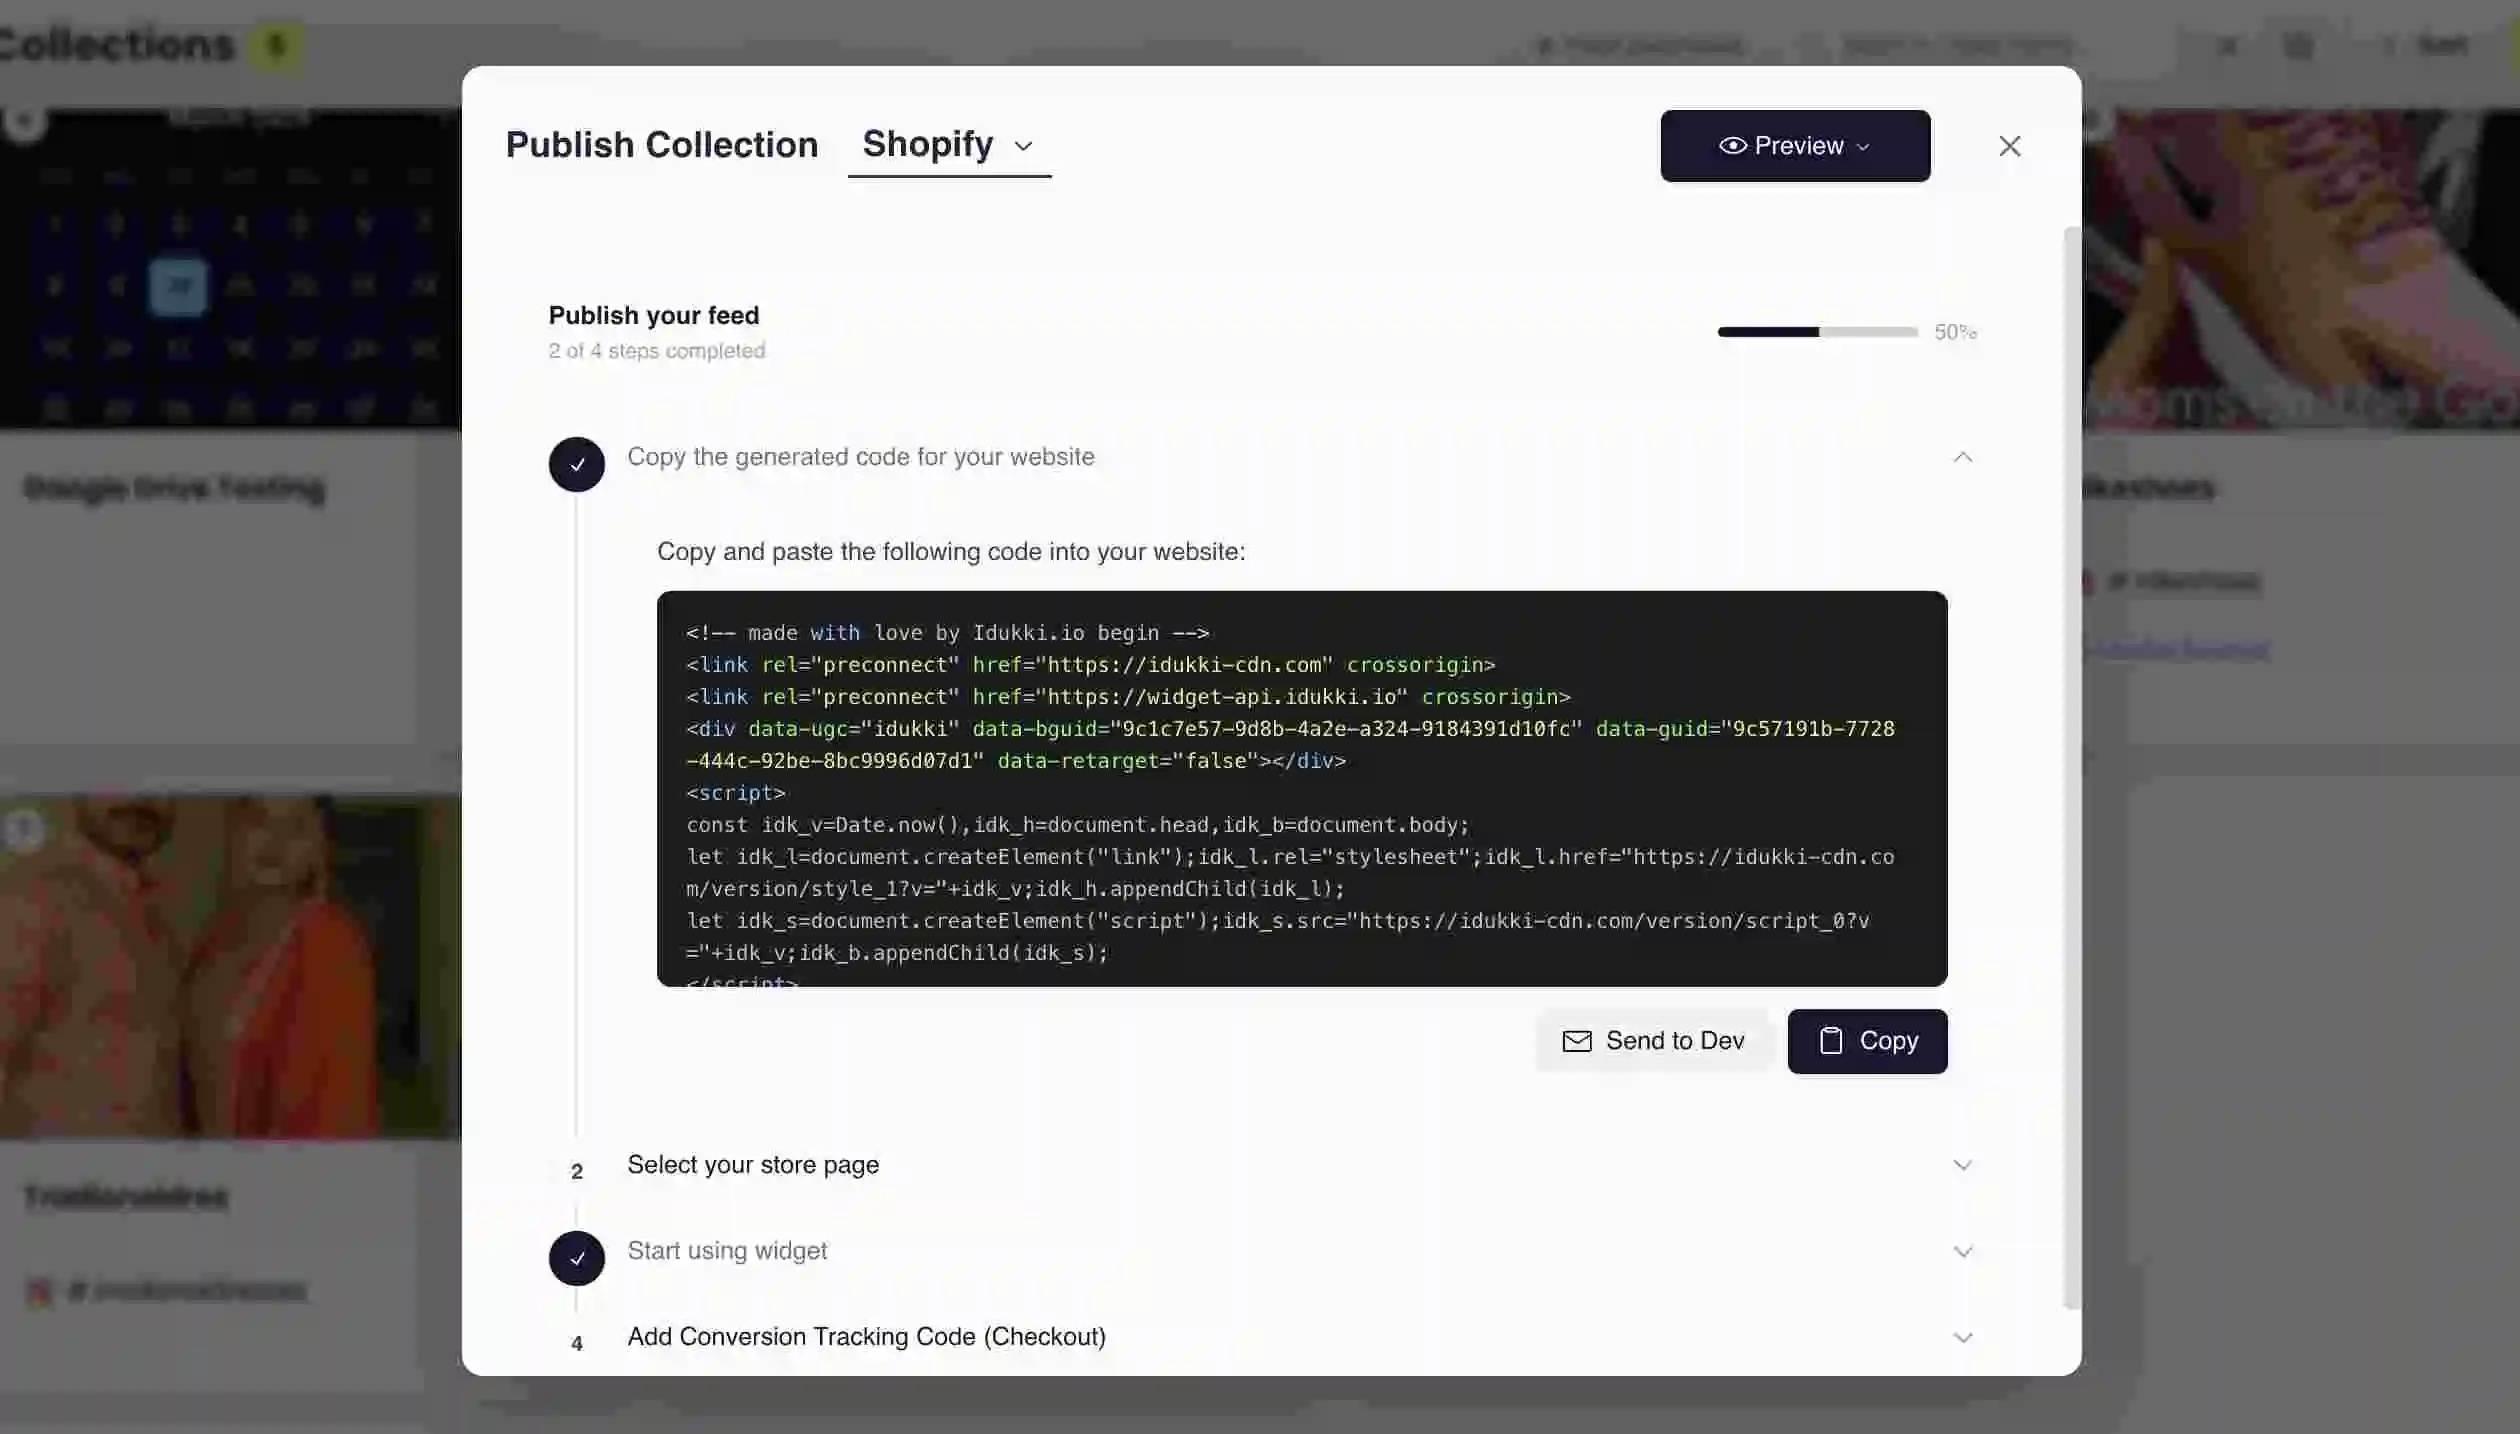
The Publish Collection screen - Copy the generated code. On the website path, the screen shows "Copy and paste the following code into your website" with a ready-made snippet. Click Copy. (There is also an option to email the code to a developer.)
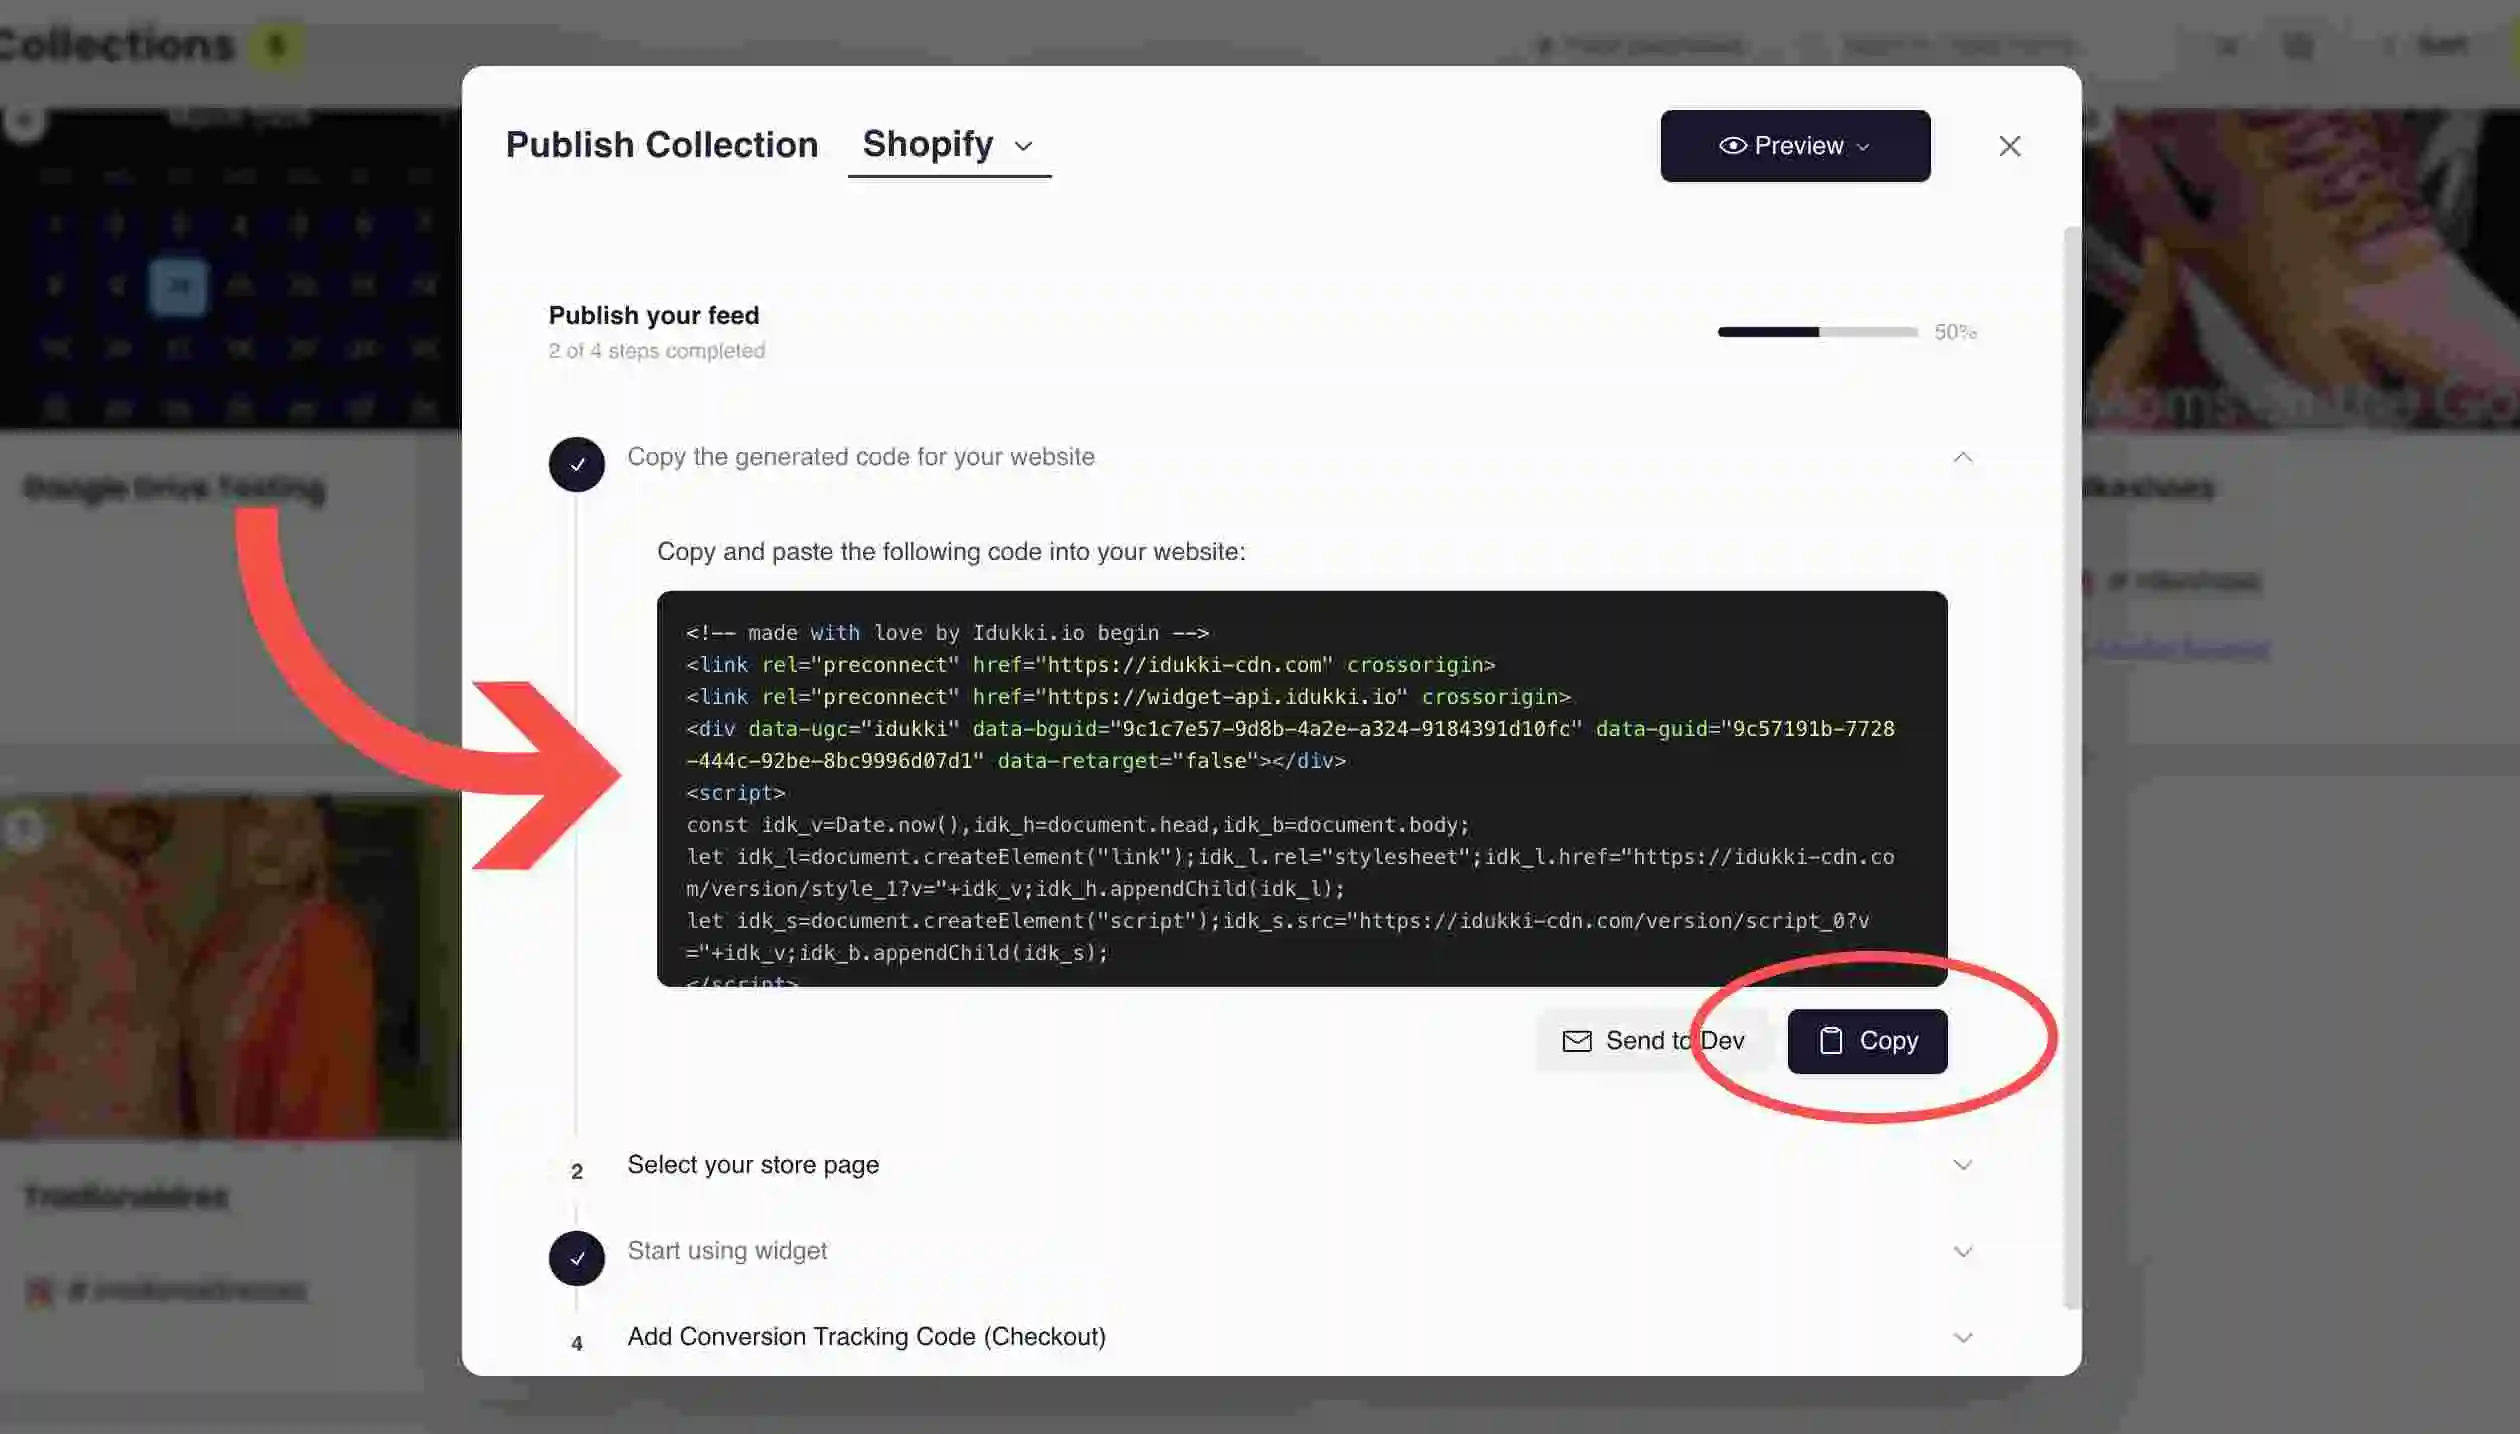
The generated embed code with a Copy button - Place it on your store. Paste the snippet where you want the widget. On Shopify you can select your store page from the dropdown and follow the guided steps; on other platforms paste it into the page or template.
Selecting a store page in the Shopify publish flow - Add conversion tracking (Shopify). For purchase attribution on Shopify, copy the conversion tracking code from the Add Conversion Tracking Code (Checkout) step and add it as instructed.
- Preview and publish. View the page on desktop and mobile, confirm the widget renders and tagged products show their cart or buy action, then publish.
- Watch the first events. Open your dashboard and confirm views and clicks start flowing in. That tells you tracking is wired up correctly.
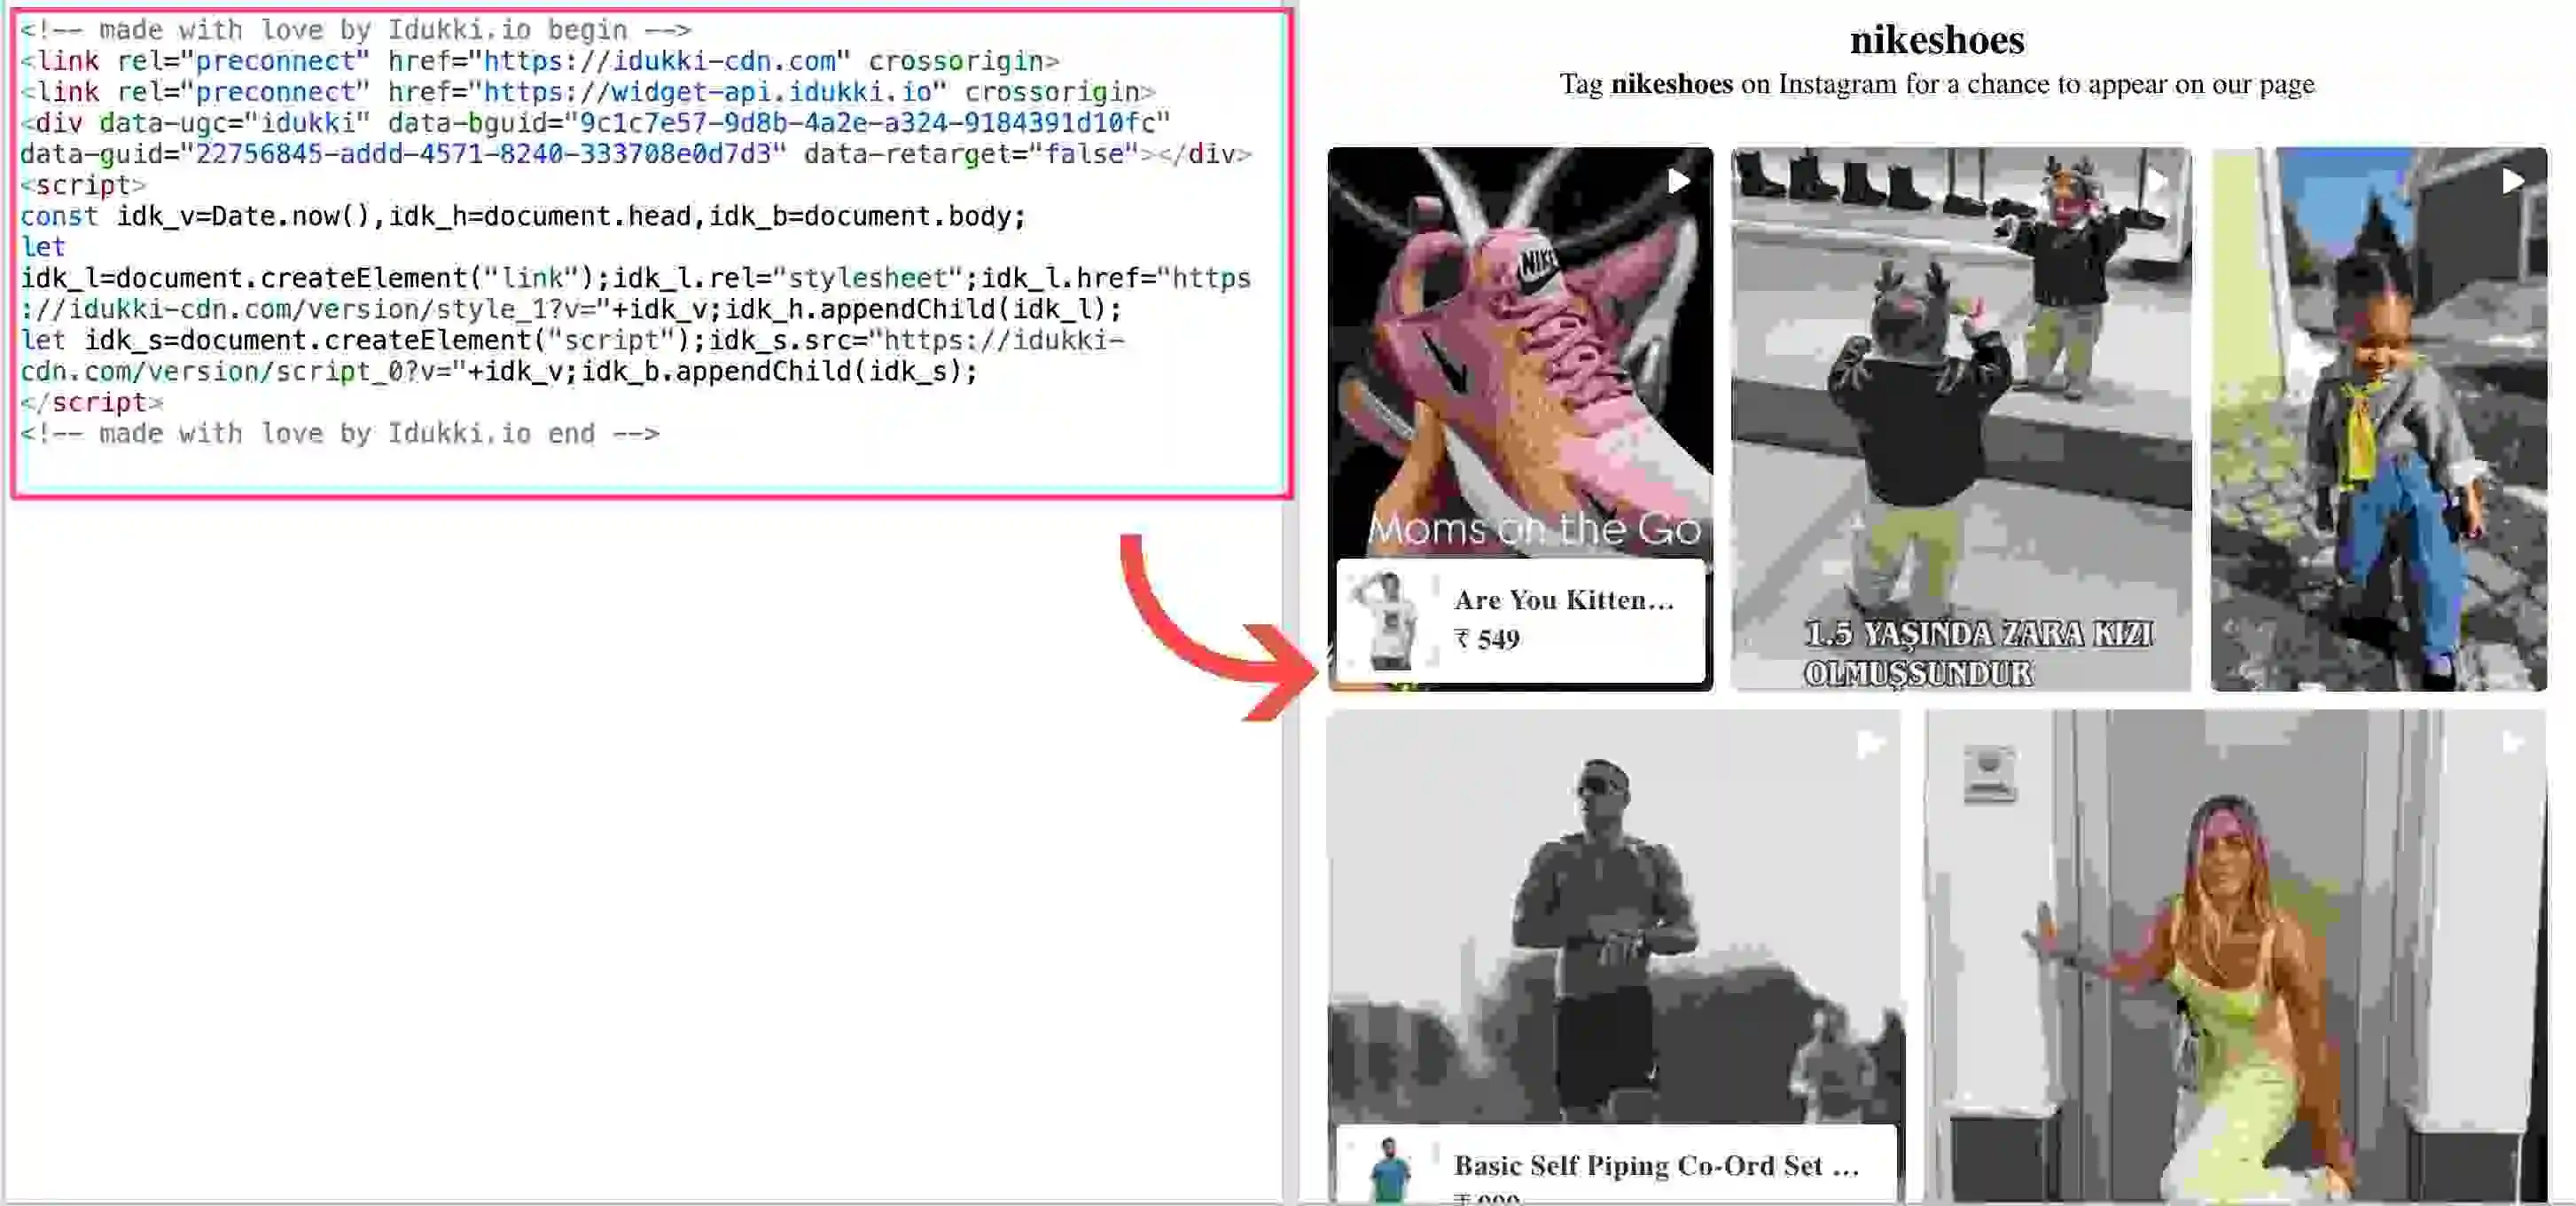
The generated snippet loads the widget into a container you place on the page. It looks roughly like this (your real bguid and guid are filled in for you by the Publish screen, so always copy the live version from there):
<div data-ugc="idukki" data-bguid="YOUR_BGUID" data-guid="YOUR_COLLECTION_GUID" data-retarget="false"></div>
<script>/* Idukki widget loader, copied from the Publish Collection screen */</script>Common questions
- Do I need a developer to install?
- No. The Publish Collection screen generates the code for you, and on Shopify it guides you through selecting a page. You copy and paste, or email the snippet to a developer if you prefer.
- Will the widget slow my site down?
- It is built to stay out of your Core Web Vitals: it reserves layout space, lazy-loads media and only mounts interactivity when it scrolls into view.
- Can I change the collection later without re-installing?
- Yes. The snippet points at a collection by its guid, so edits to that collection appear automatically with no code change.
Related guides
- Create a gallery and choose a layout: /help/create-a-gallery-choose-layout
- Customise widget appearance: /help/customise-widget-appearance
- Place widgets across multiple channels: /help/place-widgets-multi-channel


