Hotspots let you place one or more clickable product markers on a post. Each hotspot opens a small panel with the product and a buy or add-to-cart action, so a single image becomes shoppable in several places at once. Hotspot tagging is used on grid-style posts.
Add a hotspot
- Open Tag Products. Open the post’s three-dot menu and choose Tag Products under the Engage section.
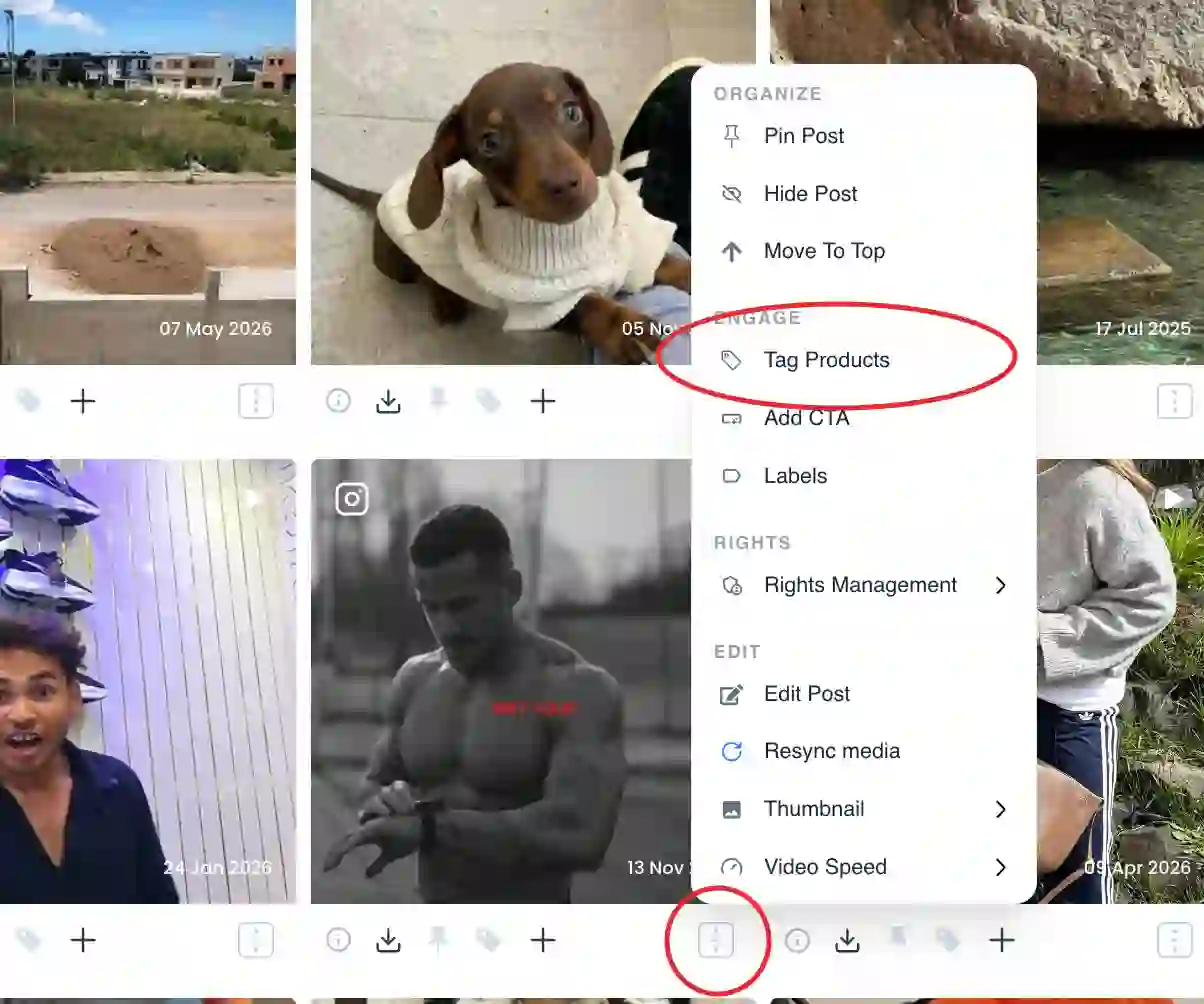
Tag Products option under the Engage section - Choose Hotspot Tagging. In the Tag a product dialog, pick Hotspot Tagging: "Tag a specific item in the photo to create a clickable icon for product details."
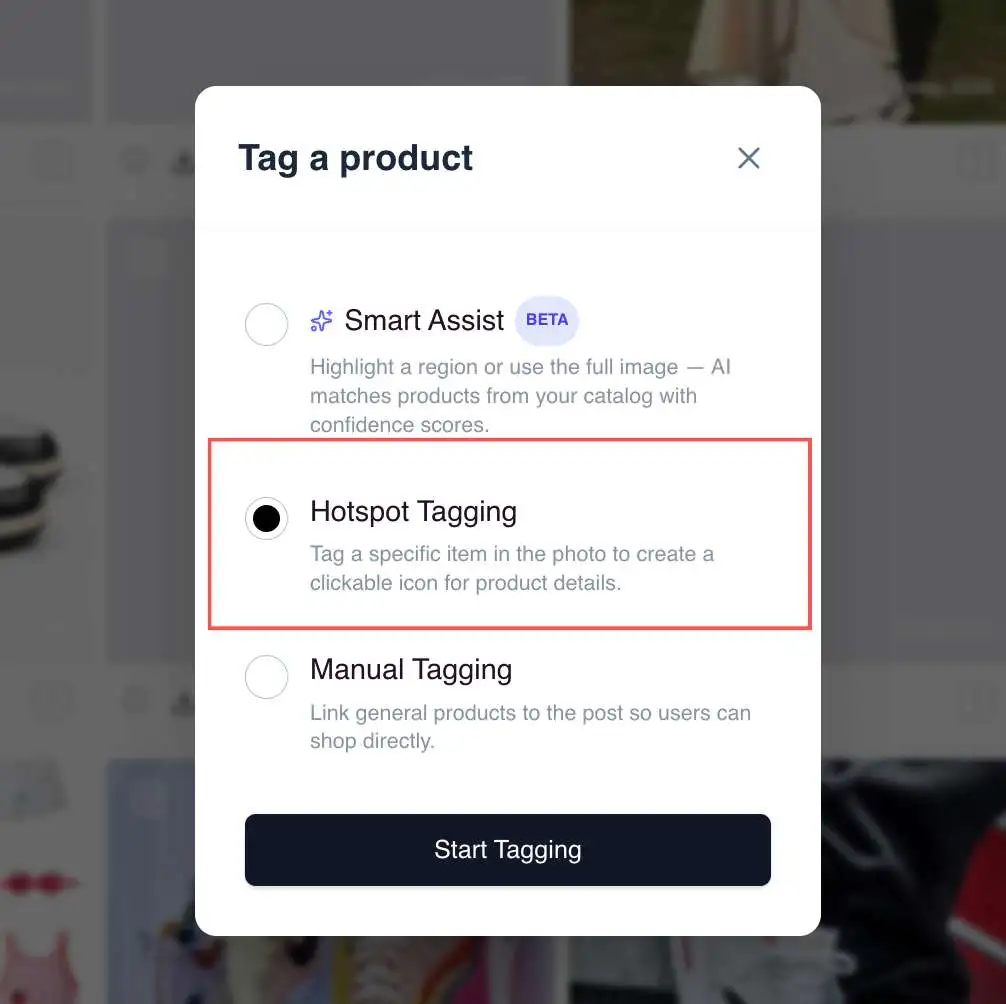
Hotspot Tagging option in the Tag a product dialog - Drop a pin on the item. Click where the product appears in the image to place a hotspot pin.
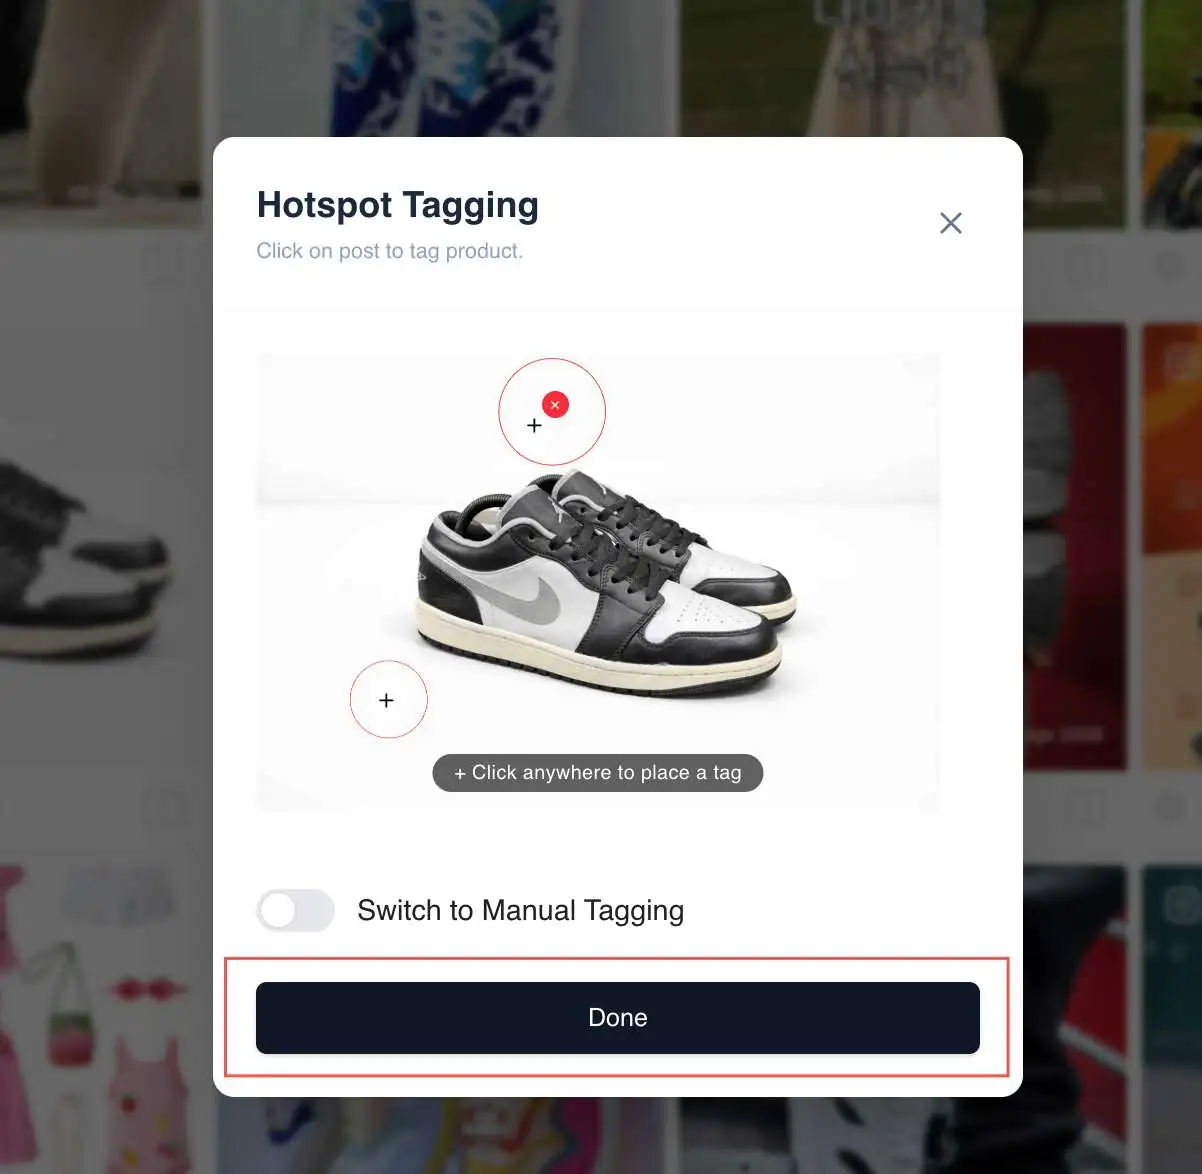
Placing a hotspot pin on a product in the photo - Attach the product. Pick a synced product, or enter a product link, name and price directly for items not in a connected catalogue.
- Position and save. Drag the pin to sit on the product and save. Positions are stored relative to the image so they scale as it resizes.
Styling the pins
You set how hotspot pins look on the Products tab of the layout editor, and the style applies across the widget.
- Hotspot Pin Style: the icon shape. The options are Bag, Plus, Dot, Number and Price.
- Hotspot Pin Color: the fill colour of the pin icon.
- Hotspot Beacon Style: the animation. The options are Pulse, Solid, Ring, Glow and Pin.
- Hotspot Open Style: how the product panel opens from a pin (for example Card, Drawer, Modal, Bottom, Inline or Fullscreen).
Common issues
If a pin lands off-target, drag it; positions scale with the image. If pins are hard to see, change the Hotspot Pin Color or Beacon Style on the Products tab. If you would rather not place markers on the exact item, use Manual Tagging to link products to the whole post instead.
Related guides
- Tag products manually: /help/manual-product-tagging
- AI product tagging, how it works: /help/product-tagging-ai
- Customise widget appearance: /help/customise-widget-appearance


